TP Link Tapo C100 and Shinobi
Setting up the fairly inexpensive Tapo C100 with Shinobi (a locally hosted CCTV system) and Home Assistant (with HACS) wasn’t as hard as I thought it was. This guide will show you how to set up Shinobi, Home Assistant will be at another time.
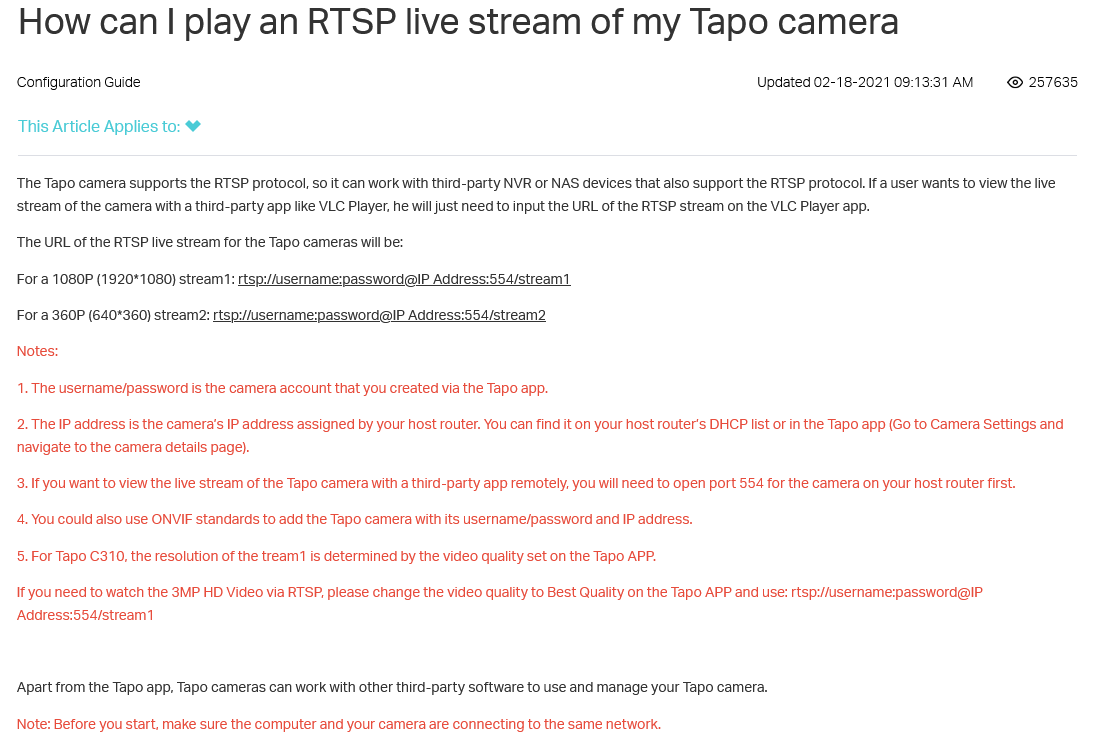
The Tapo C100 thankfully supports the RTSP protocol (and TP-Link have been gracious enough to provide some documentation) which Shinobi can work with. I’ve included a screenshot, below, of the documentation as it’ll inevitably 404 at some point.

First, set up your Tapo C100, make sure its up to date and make sure Shinobi is also ready to go. You’ll also want to create a Camera Account on the Tapo app (located under camera settings (cog) > Advanced Settings > Camera Account) and use these credentials on Shinobi. Whilst you’re here you’ll also want to find your camera IP. This can be found by clicking on the thumbnail and device model at the top of the settings menu.
Ensure port 554 is open on your router.
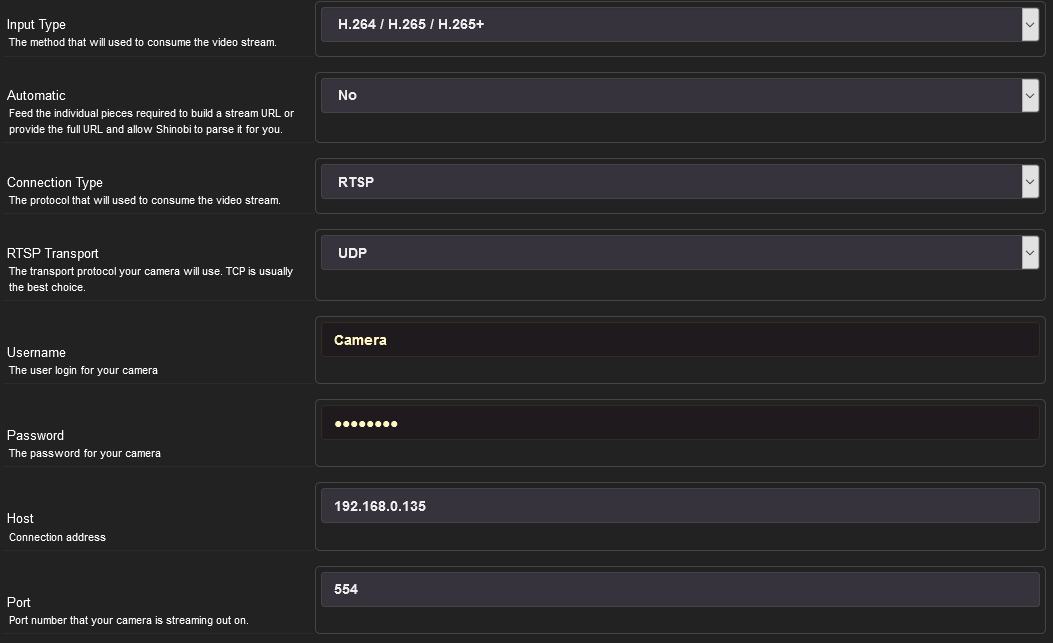
Next, create new monitor on Shinobi, for myself I left everything default and went straight to Connection.
The below settings are what I used Input Type: H.264 / H.265 / H.265+ Automatic: No Connection Type: RTSP RTSP Transport: UDP Username: [Whatever you specified in Camera Account earlier] Password: [Whatever you specified in Camera Account earlier] IP: [Located under device settings] Port: 554 Stream: /stream1
Everything else I left as-is.

Click save and all being well, you should now have a thumbnail of the camera under Monitors. Note: You may want to give it a little while on the first load. I’ve found being impatient causes it not to work – it’s as if it knows.